Let’s face it, if taking blurry photos was an Olympic sport, we’d all be retired gold medalists by now. From capturing the little one skipping through the park to taking a star-struck selfie with *insert famous person here*, what seems like a simple task of tapping a circular shutter button doesn’t always generate a perfect result.
Google’s Pixel camera team apparently knows a thing or two about that, and it’s no longer waiting on the hardware side of things to help you correct your shaky photos and unblur the lines. The latest Google Photos feature, Photo Unblur, takes to artificial intelligence to scan previously-captured images and applies a sharpening filter that magically “unblurs” the subject(s).
If you own a Pixel 7 or 7 Pro, here’s how you can use the exclusive software feature to relive your old memories with a little more clarity.
Also: Google Pixel’s Magic Eraser can wipe out the most obnoxious photobombers
How to use Photo Unblur on the Pixel 7
For starters, you’ll be doing all the editing via Google’s Photos app, so make sure that’s updated to the latest firmware. Note that owning the app on a non-Pixel 7 model doesn’t mean that you’ll have the feature unlocked. Not yet, at least.
Here’s a before (left) and after (right) using Photo Unblur.
June Wan/ZDNET
If your Google Photos app is up to date, scroll through your catalog of images and select one that you’d like to unblur. Tap on the photo to expand it, and then tap the Edit option in the bottom menu.
Note: As the name implies, Photo Unblur only works on photos, not videos.
From here, there are two ways to access the Photo Unblur tool. If Google detects that the photo is blurry, to begin with, the feature toggle will appear in the Suggestions tab. Otherwise, tap the Tools category and then Unblur.
In both cases, once you select Unblur, the app will buffer for a good 2-3 seconds while it studies the various lines, curves, and elements of your photo, and then remasters it so that the subject(s) are better defined.
You can use Unblur from the Suggestions tab or the Tools tab.
Screenshot: June Wan/ZDNET
The finished product will appear at the 100% filter level, meaning it can’t (or shouldn’t) be sharpened any further. In most cases, I found the Pixel’s max output adequate and shockingly natural looking.
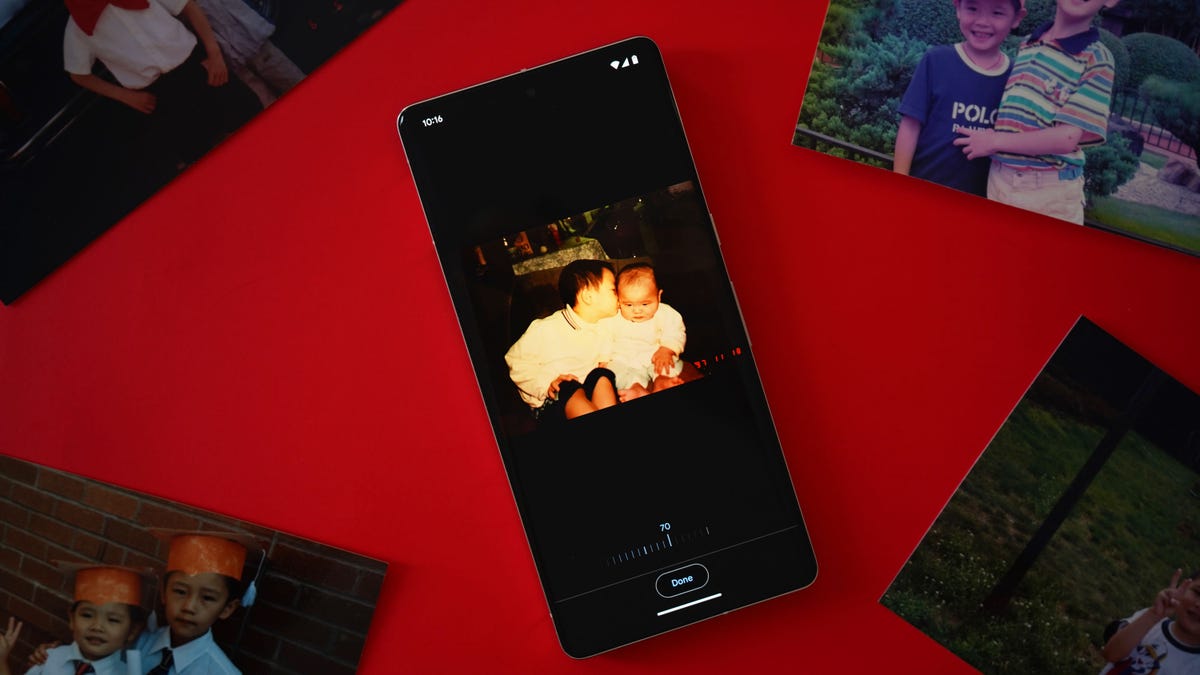
Not all edits will be flawless, though, which is why you can still dial down the filter level so that the output is less sharp or artificial. While in the editing menu, you can also pinch into your photo to get a better look at the changes.
Should you be satisfied with the touch-up, tap Done and then Save. The unblurred image will be saved as a copy so you still have the original for keepsake.
The Photo Unblur meter can be adjusted to your liking.
June Wan/ZDNET
This isn’t new technology by any means — you can perform similar sharpening mechanics in Adobe Photoshop, for one — but it’s the one-click factor and ease of use that makes Photo Unblur so addictively satisfying.
Note: This article have been indexed to our site. We do not claim legitimacy, ownership or copyright of any of the content above. To see the article at original source Click Here

