It is now possible to extend the storage on PS5 by integrating a new SSD into the console. Here is our step-by-step guide to installing a new SSD in the PlayStation 5.
To increase storage on console, there are several different solutions on PlayStation 5 and Xbox Series . If the two manufacturers propose to add an external hard drive to the console, it no longer allows you to run a “next-gen” game natively, and for good reason, they are now designed to run on particularly fast SSDs.
To solve this problem, Microsoft and Sony have opted for different solutions. The first offers an easy-to-install proprietary expansion card , while the second has chosen a standard solution, an NVMe SSD of PC, but a little more complex to install. The other advantage of the PlayStation solution is to be able to play on prices more easily, by making the competition work in the PC world.
Which SSD to choose for the PS5?
First element of complexity on the Sony side: you have to pay attention to the SSD you choose to be sure to have good performance with the console . SSDs are not designed specifically for the PS5, so you have to pay attention to the characteristics.
Check compatibility
To choose a good SSD for the PS5, there are several criteria to take into account. We have an article dedicated to the question of compatibility to look in detail at the criteria . In a nutshell, the SSD must be a PCIe 4.0 NVMe SSD with a transfer speed of at least 5500MB / s and the physical dimensions are 22mm wide by 30 to 110mm long.


This SSD has a heatsink
Another element to take into account: the heat sink. Either the SSD integrates it directly, and in this case you have to take care of the physical dimensions, or it does not, and you have to install one. In this case, we can recommend the be quiet! MC1.
- The list of all SSDs officially compatible with the PS5
Once you have your SSD, you can start the operation.
Update the console
First of all, you must start by making sure you have installed the latest updates for the PlayStation 5. If your console does not run at least on version 21.02-04.00.00.42, it does will simply not be able to boot with the SSD installed. It is therefore essential to have updated the console before starting to install the additional storage.
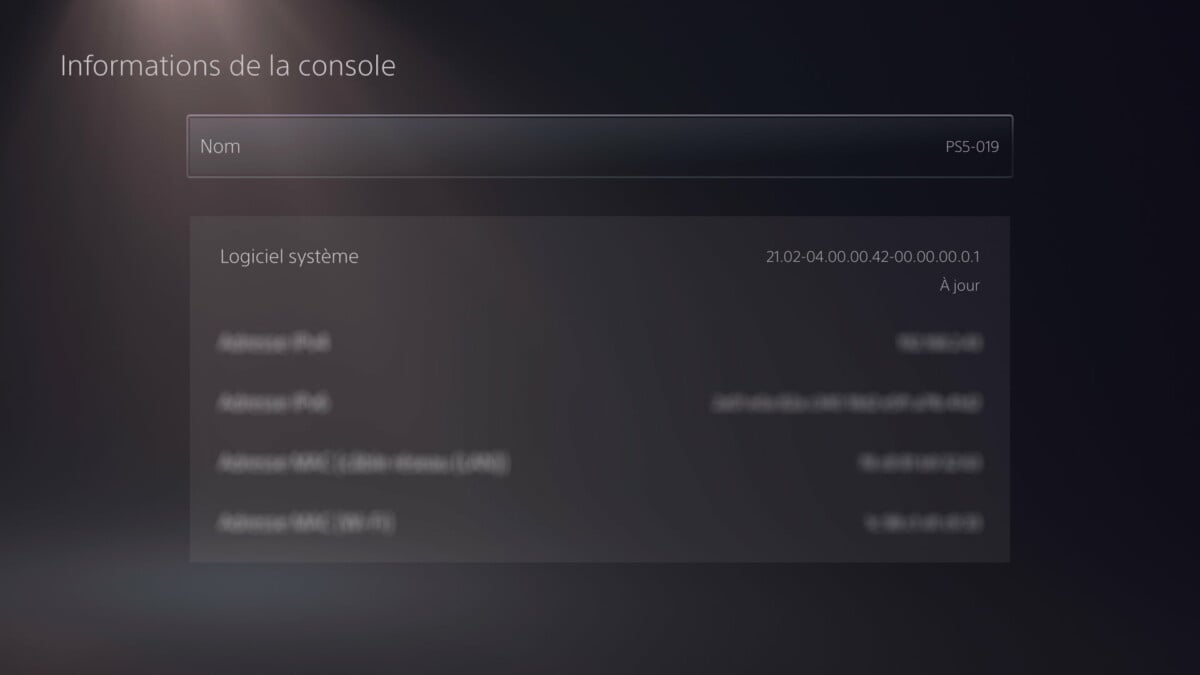
To be sure that the console is up to date, the easiest way is to go for a walk in settings, under System and look for an update. It is also possible to check the version number in the “console information” section.
If your console is correctly up to date, remember to turn it off before unplugging it.
Install the SSD in the PS5
If your SSD comes directly with a heatsink installed, you can go to the “open the console” step.
Install the cooling
Before installing the SSD, it is necessary to install a heat sink if it does not have one. In our example we use a Samsung 980 Pro SSD and a heatsink be quiet ! MC1. The installation is relatively simple, you must first observe the direction of installation.
In the length, it You just have to align the SSD and the two parts of the heatsink so that the holes for the screw are on the same side. Make sure that the top of the heatsink, its largest part and responsible for cooling, is on the side of the SSD storage chips. We describe a lot here, but in reality it’s rather instinctive, and the heatsink also comes with an explanatory note.

Once the heat sink is correctly positioned, all you have to do is remove the plastic tab that protects the stickers on each side of the heatsink to put the heatsink in the right place on the SSD. In the case of the Be Quiet heatsink, all you have to do is position the screws supplied with the device to firmly tighten the heatsink with the SSD.
Open the console
We move on to the operation which can ultimately be the most frightening: opening the console. First of all, take care to remove the removable stand from the PlayStation 5.
Once this is done, you must put the console horizontally, taking care to position the face with the PlayStation logo against the worktop.
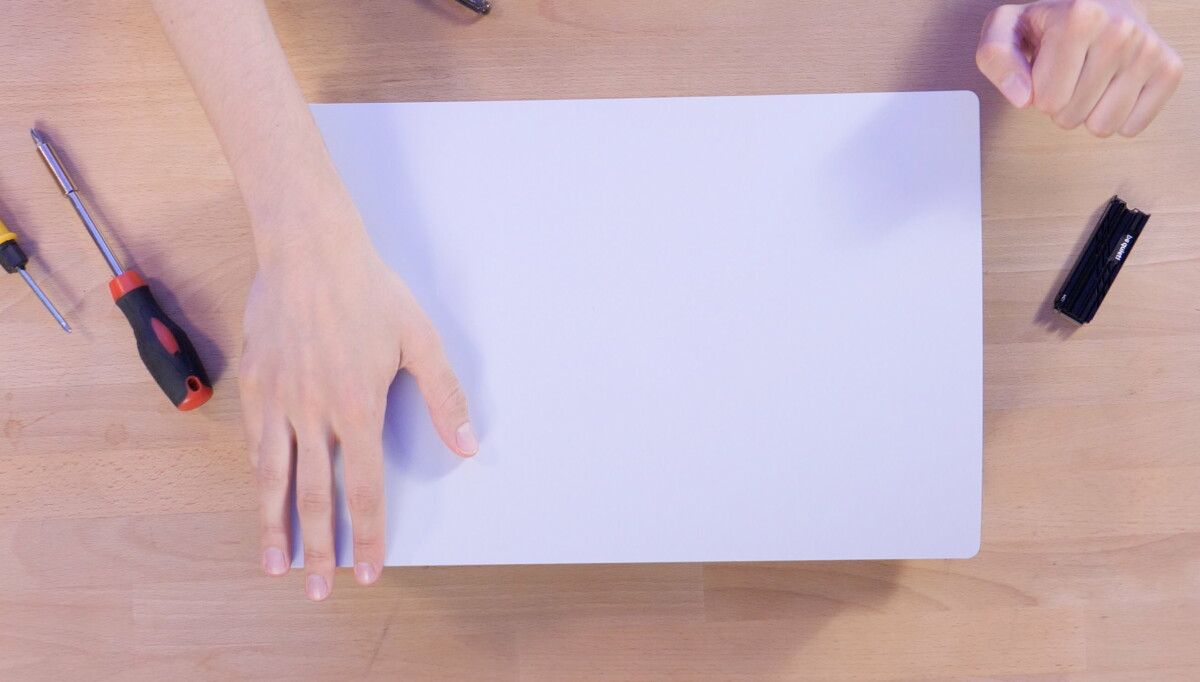
You must then remove the white wall. To do this, you have to push up on the console while pulling outwards. Applying a little force, the PlayStation 5 panel should come off, revealing the chassis with the fan and a few ventilation holes.
Install the SSD
With the PlayStation 5 always lying horizontally, without its white wall, it is necessary to identify the location of the SSD. This is a slender slot protected by a gray metal cover and a screw. With a Phillips screwdriver, unscrew the gray cover to reveal the location provided by Sony to install the SSD.
Before placing the SSD, you must first unscrew the screw which should be by default located at the 110 mm marker. Be careful, there is also a small metal ring to recover in this operation. Place the metal ring in the correct position for your SSD. In our case, it is a Samsung 980 Pro, a fairly standard NVMe 2280 SSD on a PC and we therefore place the ring at 80 mm.
You must then install the SSD, starting by inserting the PCI Express connector into the port provided for this purpose. A key prevents installation in the wrong direction.
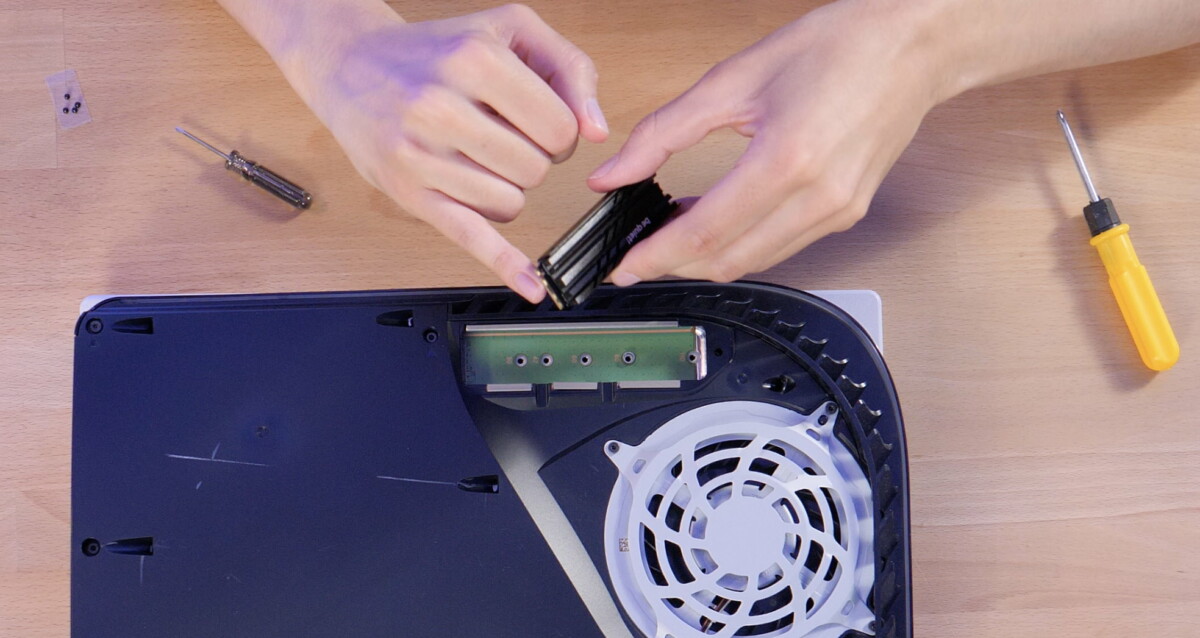
Apriori, the heatsink should be turned towards the outside of the console, so there is only one possible direction. By pushing a little in the port, you should feel a sag in the SSD signifying that it is properly installed.
Then just screw the small screw that went with the ring, at the 80 mm location in our example.
Close the console
Once the SSD is installed, just repeat the operations in the opposite direction. First close the SSD cage by replacing the small gray metal element with its screw, then replace the white wall of the console, again using a little elbow grease.
To replace the wall, use the various white plastic “screws” to help you locate its installation.
Install or move the games on the SSD
On first launch, the console should detect the new SSD and offer to format the storage so that it is readable by the console.
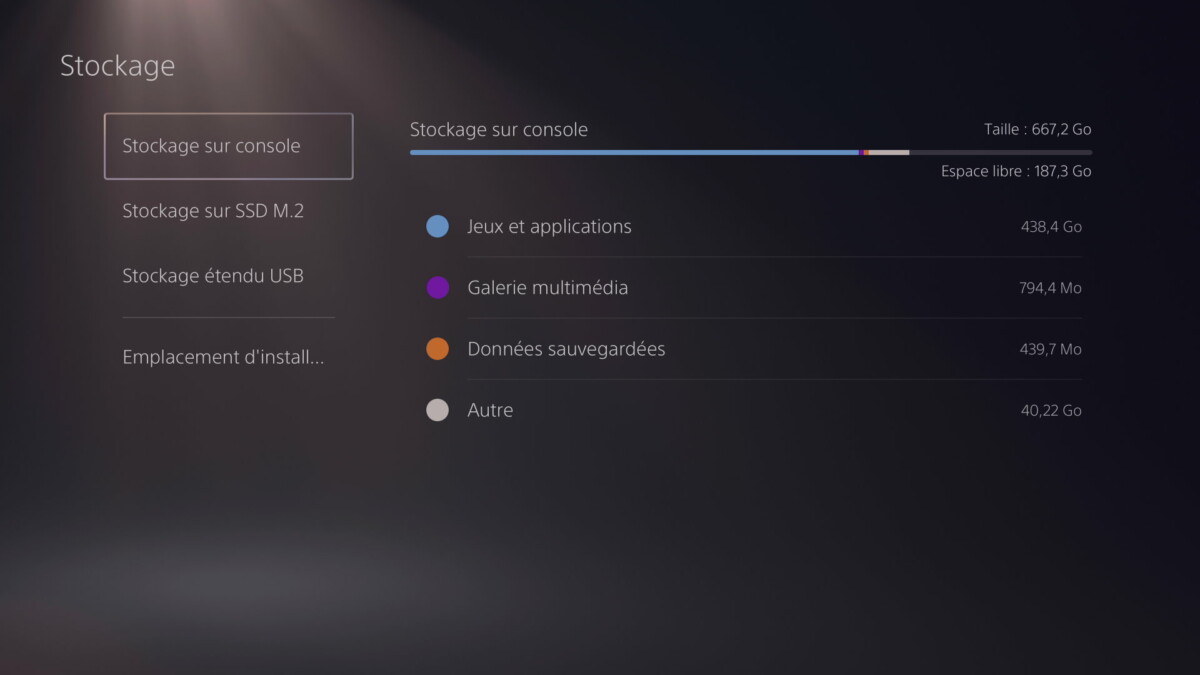
How to move a PS5 game to the M.2 SSD? Now the interface of The PlayStation 5 will name your additional SSD the “M.2 SSD” to differentiate it from the “Console Storage” SSD. You can easily move your games from the console settings, in the storage section.
Then simply choose “games and applications” to access the list of games. You can then select the titles you want to move to the M.2 SSD storage of the console.

How to install default games on M.2 SSD
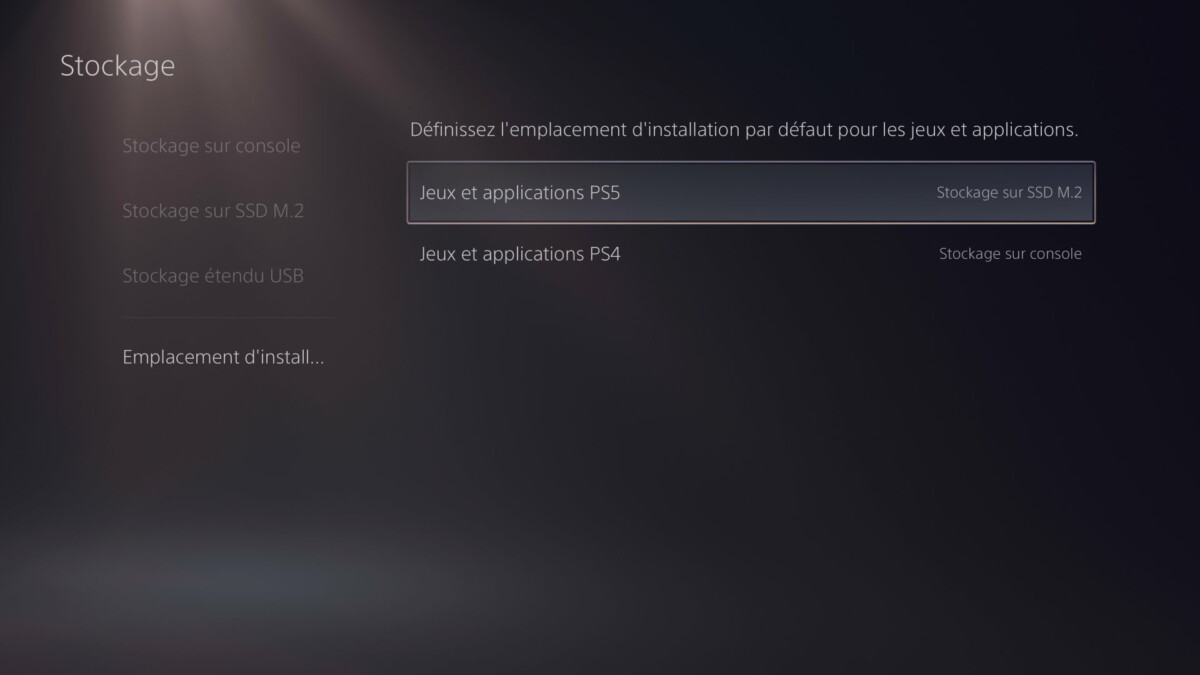
Rather than always moving the games by hand, it is possible to install them directly on the M.2 SSD automatically.

Again, this option is in the storage settings from the console. It is possible to set a separate location for PS5 games and apps as well as for PS4 games and apps. For example, you can configure the first to install the PS5 games on the M.2 SSD, and the second to install the games on an external hard drive.
In principle, one of the advantages is that it will be possible to keep this SSD by changing the console. For example if a PS5 Slim or a PS5 Pro should see the light of day.
Note: This article have been indexed to our site. We do not claim ownership or copyright of any of the content above. To see the article at original source Click Here

How to install default games on M.2 SSD
Rather than always moving the games by hand, it is possible to install them directly on the M.2 SSD automatically.
Again, this option is in the storage settings from the console. It is possible to set a separate location for PS5 games and apps as well as for PS4 games and apps. For example, you can configure the first to install the PS5 games on the M.2 SSD, and the second to install the games on an external hard drive.
In principle, one of the advantages is that it will be possible to keep this SSD by changing the console. For example if a PS5 Slim or a PS5 Pro should see the light of day.
Note: This article have been indexed to our site. We do not claim ownership or copyright of any of the content above. To see the article at original source Click Here

AutoScooper 11 Self Cleaning Cat Litter Box, Automatic Cat Litter Box for Multiple Cats, Integrated Safety Protection with Open-Top Design
$239.99 (as of February 22, 2025 19:36 GMT +00:00 - More infoProduct prices and availability are accurate as of the date/time indicated and are subject to change. Any price and availability information displayed on [relevant Amazon Site(s), as applicable] at the time of purchase will apply to the purchase of this product.)
DJI Mic Mini (2 TX + 1 RX + Charging Case), Wireless Microphone for iPhone/Camera/Android, Ultralight, Detail-Rich Audio, 48h Use, Noise Cancelling, Automatic Limiting, Vlog, Streaming
$169.00 (as of February 22, 2025 20:14 GMT +00:00 - More infoProduct prices and availability are accurate as of the date/time indicated and are subject to change. Any price and availability information displayed on [relevant Amazon Site(s), as applicable] at the time of purchase will apply to the purchase of this product.)
140W Charger for MacBook Pro 16 14 inch, Mac Air 15 13 inch 2024 2023 2022 2021 M3 M2 M1【Original Quality】 USB-C Fast Charger Power Adapter & 6.6FT USB C to Magnetic 3 Cable LED (UL Safety Certified)
$39.99 (as of February 22, 2025 19:36 GMT +00:00 - More infoProduct prices and availability are accurate as of the date/time indicated and are subject to change. Any price and availability information displayed on [relevant Amazon Site(s), as applicable] at the time of purchase will apply to the purchase of this product.)
DoHonest Baby Car Camera HD 1080P - Rear-Facing Car Baby Monitor with Night Vision, Adjustable View Angle, Easy Setup, Anti-Glare Display, Safety for Kids & Infants
$23.44 (as of February 22, 2025 19:40 GMT +00:00 - More infoProduct prices and availability are accurate as of the date/time indicated and are subject to change. Any price and availability information displayed on [relevant Amazon Site(s), as applicable] at the time of purchase will apply to the purchase of this product.)