


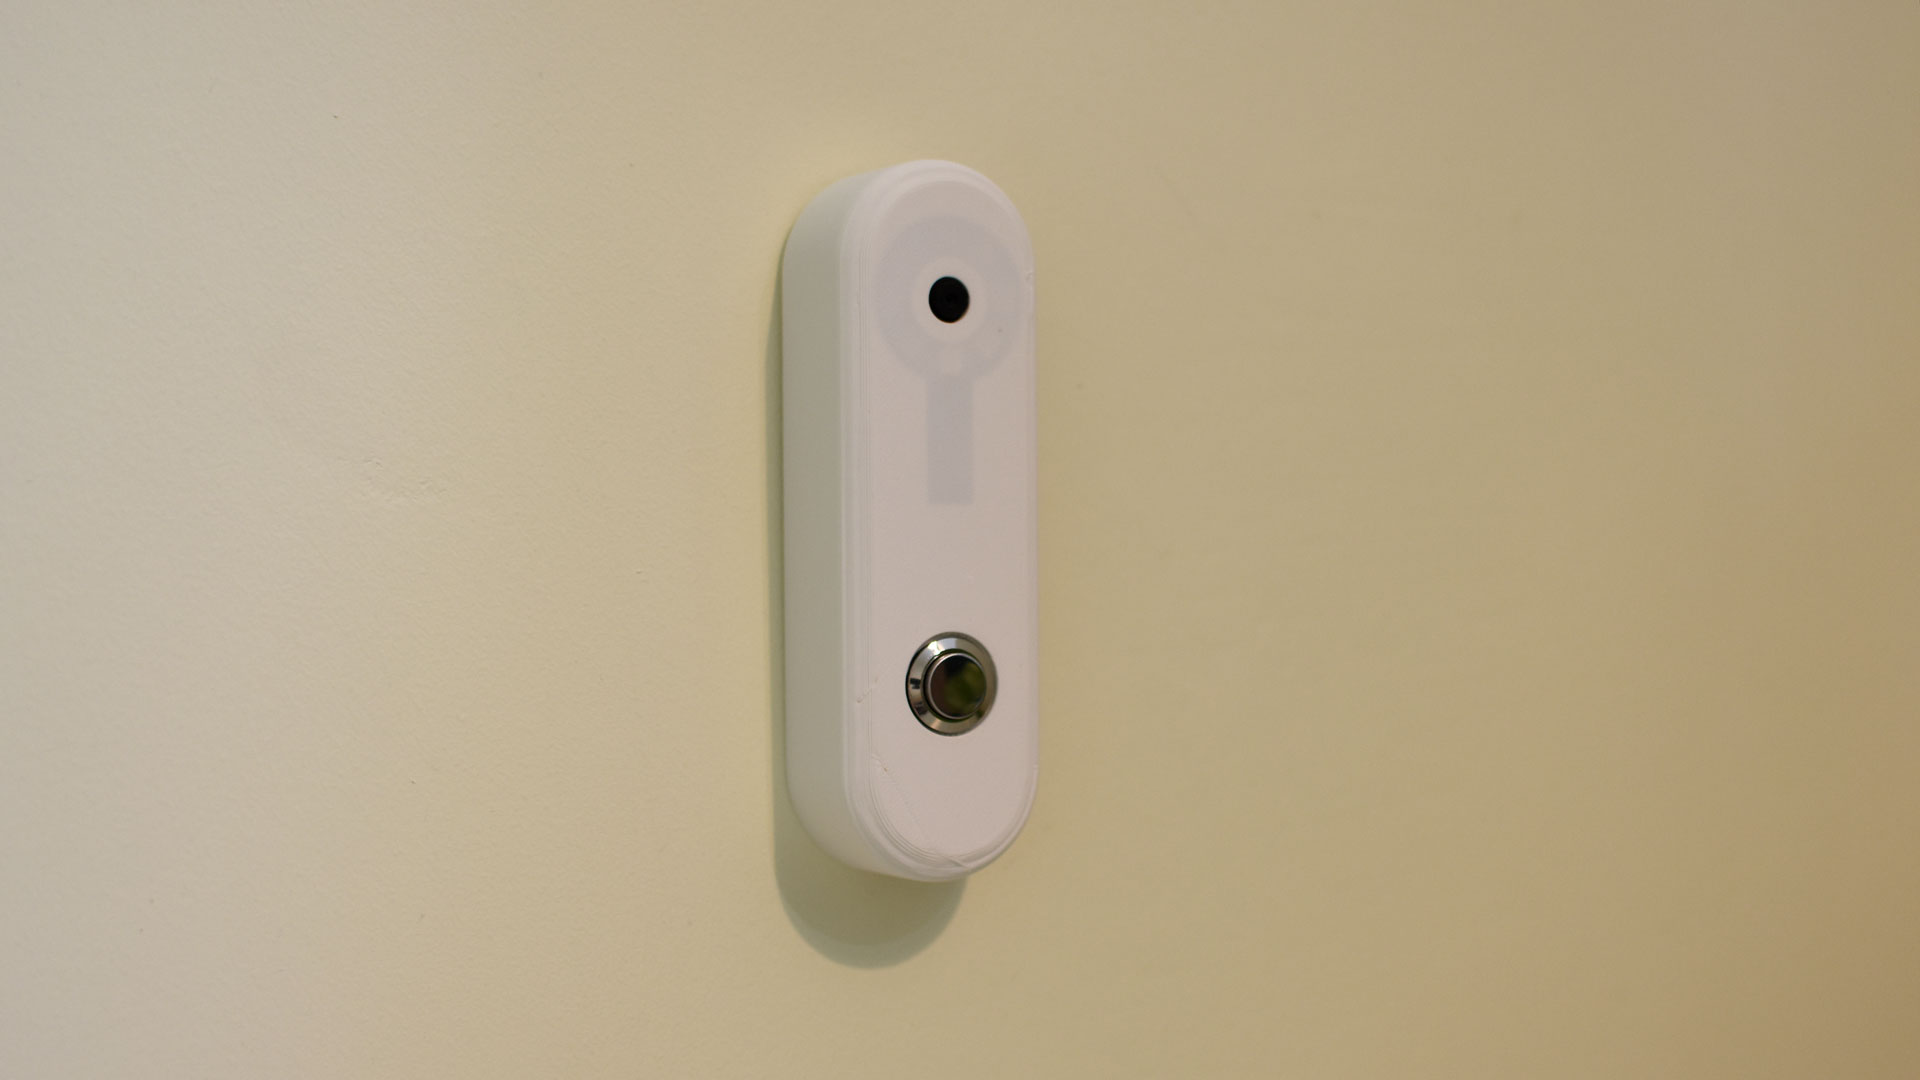
Privacy focused “smart” doorbells seem to be few and far between so I decided to build one that integrates with Home Assistant via ESPHome and is easy to build.
This project is aimed at being simple while allowing a ton of customisation and flexibility. To get started, you’ll need an instance of Home Assistant running with the ESPHome add-on as well as the Home Assistant companion app on your mobile phone to receive notifications when someone presses the doorbell button.
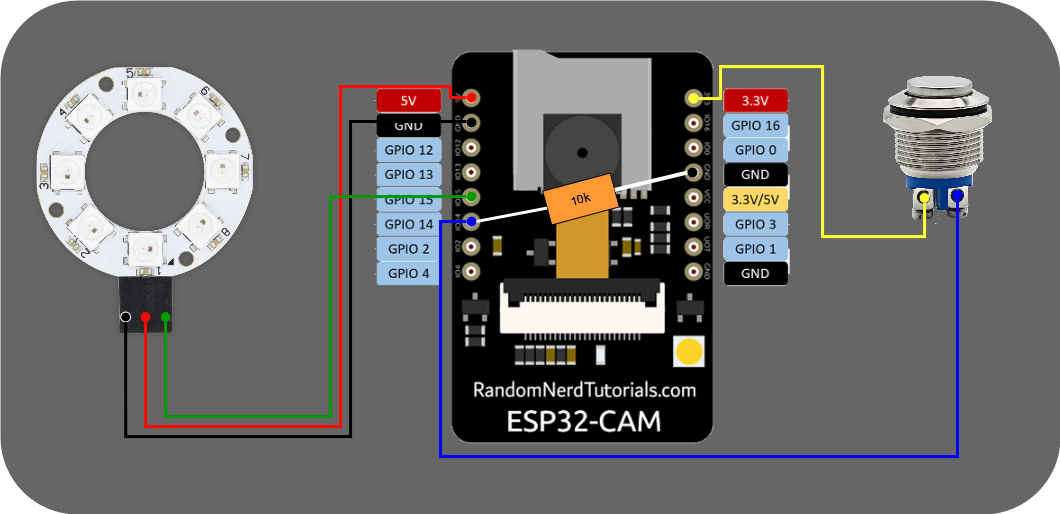
I have used an 8 RGB LED ring light in my version but if you want to simplify things, you can skip this and use the ESP32-CAM’s built in LED as a flash – it’s surprisingly bright.
Update: I’ve received a lot of questions about the need for the pull-down resistor on GPIO-14 (the pin for the button). According to this github post, the ai-thinker version of the ESP32-CAM doesn’t have all of the usual ESP32 pull-up or pull-down resistors. I tried using the INPUT_PULLDOWN feature in esphone for GPIO14 but it didn’t work. Given the number of ESP32-CAM variants coming out of China, your mileage might vary on this one.
Parts list:
- ESP32-CAM (Amazon – US, UK, DE) Make sure to get one with a “flash/download/io0” button to make your life easier when you flash ESPHome onto it for the first time. If you make the same mistake as me and buy the one without that button, follow this guide to flash the ESP32-CAM using an FTDI adapter.
- Momentary push button (Amazon – US, UK, DE)
- 10k resistor
- 8 RGB LED ring light (Amazon – US, DE) Note: these aren’t the exact ones that I used but they are the closest ones that I could find. I used the Pi Supply PIS-1270 from RS Components.
- 10m Micro USB cable (Amazon – US, UK, DE)
- M2.5 brass inserts (Amazon – US, UK, DE)
- M2.5 screws (Amazon – US, UK, DE)
- eSUN white PETG filament (Amazon – US, UK, DE)
You can find the .stl’s on Printables here and the home assistant config in my github repo: thatguy-za/esp32-cam-doorbell.
Build guide
Step 1 – Printing the enclosure
This step takes the longest so lets send the .stl’s to the printer while we crack on with the rest of the build. There are three pieces that you’ll need to print:
1. The main body
2. The ESP32-CAM retention plate
3. The back plate/wall mount
You’ll need to print the front and the back of the enclosure with supports. I printed it using PLA but you’ll want to use PETG or ABS filament so it is waterproof and use 20-30% infill.
Once everything has printed, you’ll need to add two M2.5 threaded inserts:
1. Into the front cover so you can screw the ESP32-CAM retention bracket into it.
1. Into the bottom of the backplate so you can screw on the face plate with a 10mm M2.5 screw
Step 2 – Configuring the ESP32-CAM in ESPHome
Hold down the “flash/download/io0” button and connect your ESP32-CAM to your computer using a micro USB cable. This will boot it into flashing mode.
Launch Google Chrome, go to your instance of Home Assistant and launch the ESPHome Add-on by clicking Settings -> Add-ons -> ESPHome -> Open Web UI. Chrome is important because it seems to be the most reliable browser for flashing firmware onto the ESP32-CAM.
Click + New Device to add a new device.Give it a name (“Doorbell” is probably a good starting point).
When asked to select the device type, select ESP32 and check the box “use recommended settings’.
Once the configuration has been created, you can skip installing it onto the device – we’ll do that later.
From your list of ESPHome devices, click Edit on the device that you have just created.
At the bottom of the yaml file (below captive_portal:), paste the configuration code from my github repository that is linked above.
Click Save and Install.
Select Plug into this computer.
Click Open ESPHome Web, this will allow you to flash the firmware onto the device from the web browser. This is where it is important that you are using Google Chrome.
Once the firmware has compiled, you should be able to click Download Project – this could take a few minutes.
Head over to ESPHome Web and follow the prompts to flash the firmware onto your ESP32-CAM.
Home Assistant should discover the new device once the new firmware has been flashed onto it – yay! Now you can add whatever entities you want to your dashboard.
Step 3 – Time for some automation & notifications
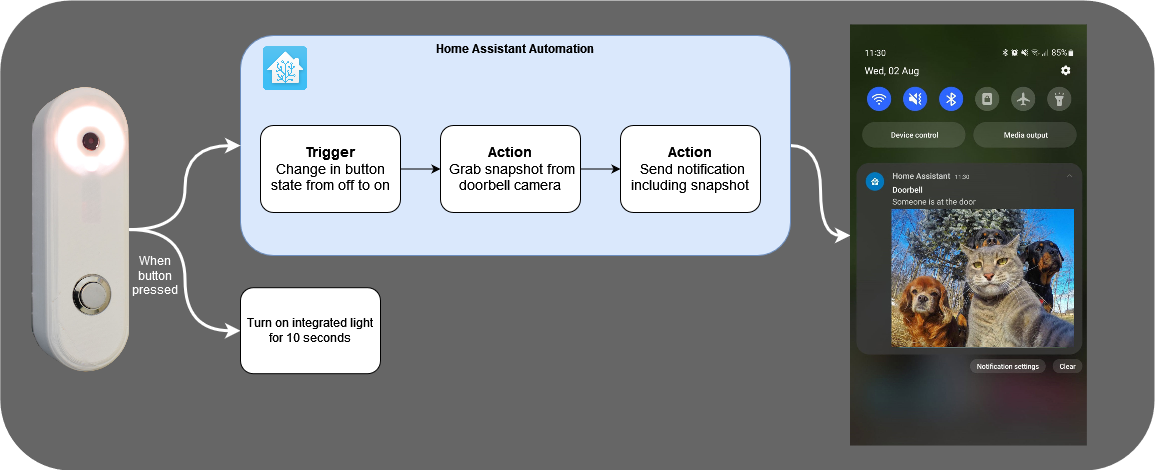
We want to create an Automation to take a snapshot from the doorbell’s camera and send it to your mobile phone when someone presses the doorbell button.
Click Settings -> Automations -> + Create Automation and then create a new automation from scratch.
Click on the three vertical dots in the top right hand corner of the screen and then click Edit in YAML
Paste the automation from my github repo (linked above) into the editor and update entity names for devices such as your mobile phone.
Save the automation and restart Home Assistant so the new automation becomes active.
Here is a summary of how the automation should behave.
Step 4 – Time to wire it up
Once the enclosure is printed, we can start the final assembly.
There are a few variants of the ESP32-CAM board, each with slightly different pinouts so double check the pinout on the board you get.
Follow the wiring guide below. I soldered everything onto the back of the lower PCB (the one with the micro USB port). It’s important to add the 10k ohm pull down resistor between GPIO14 and ground because without it, I noticed GPIO14 was floating high on quite often.
This is what it should look like when you’re done. Bonus points for covering the resistor in heatshrink tube.
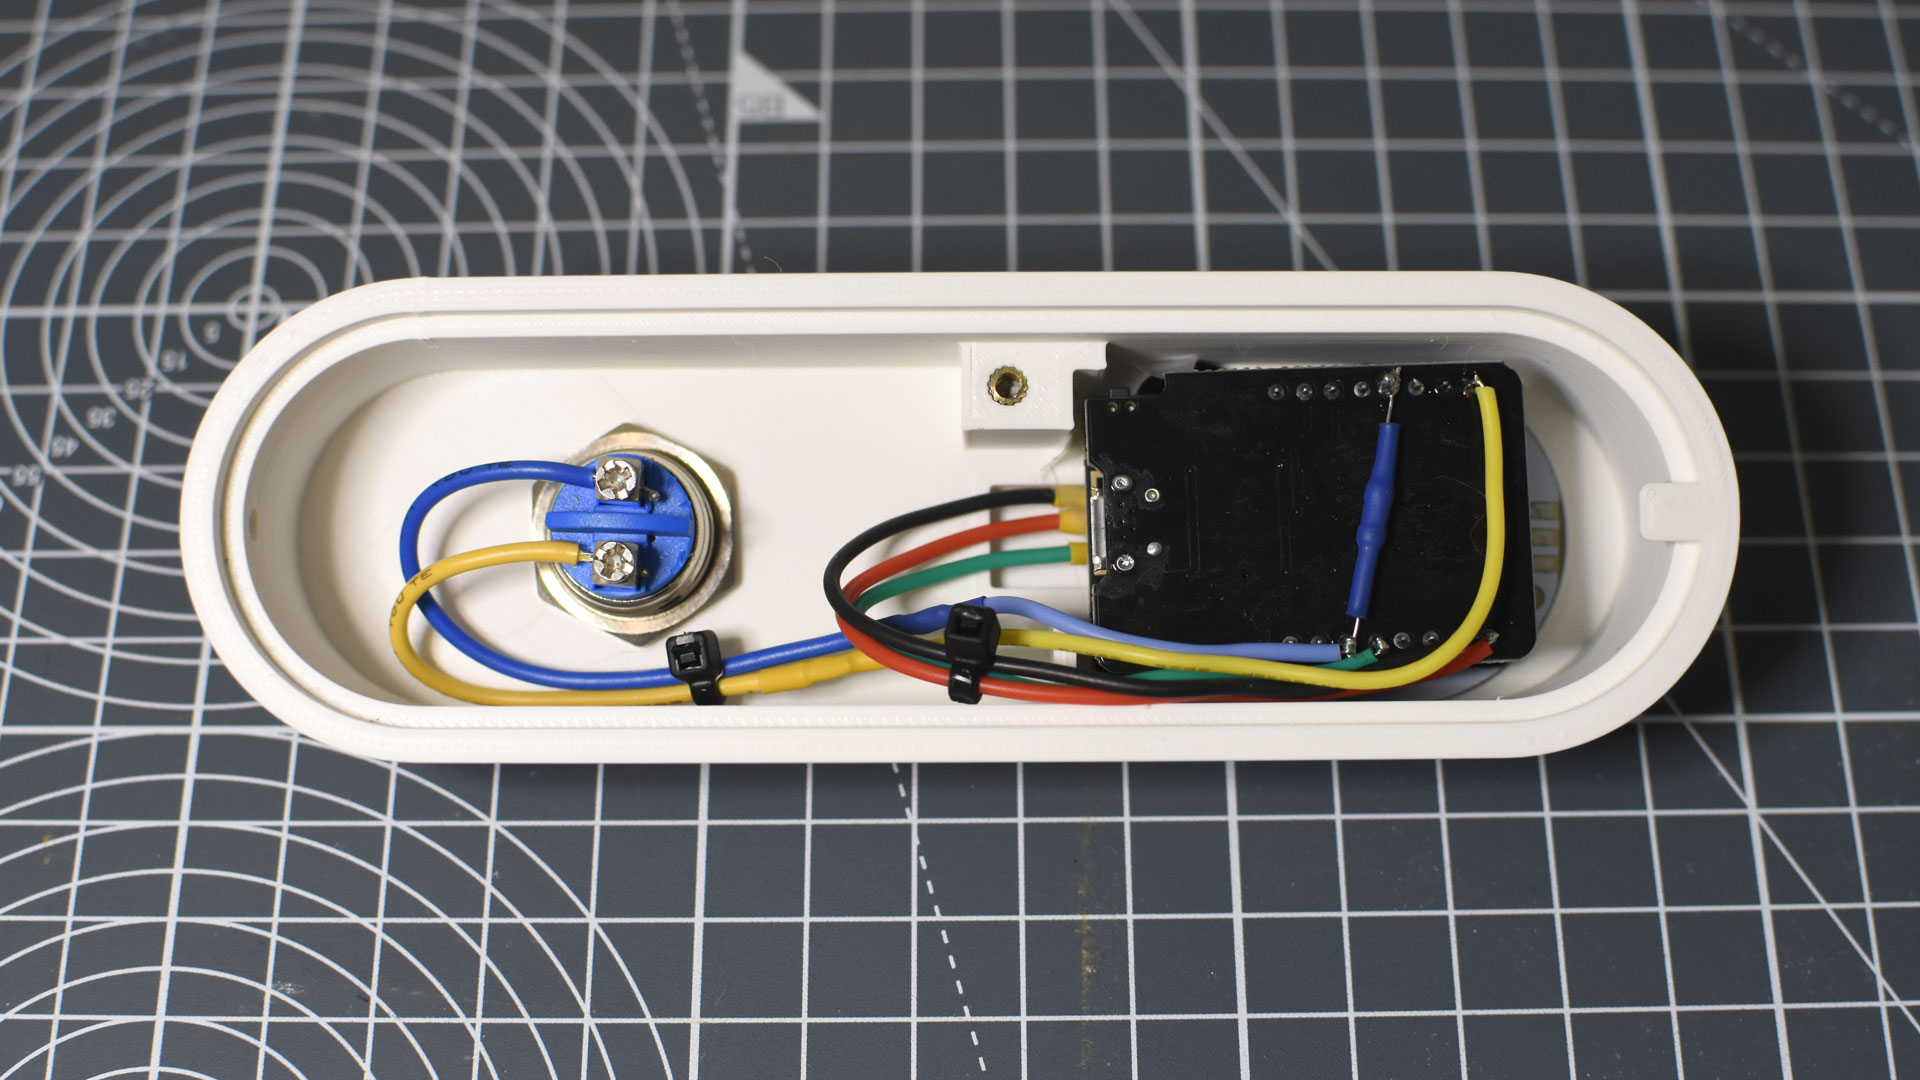
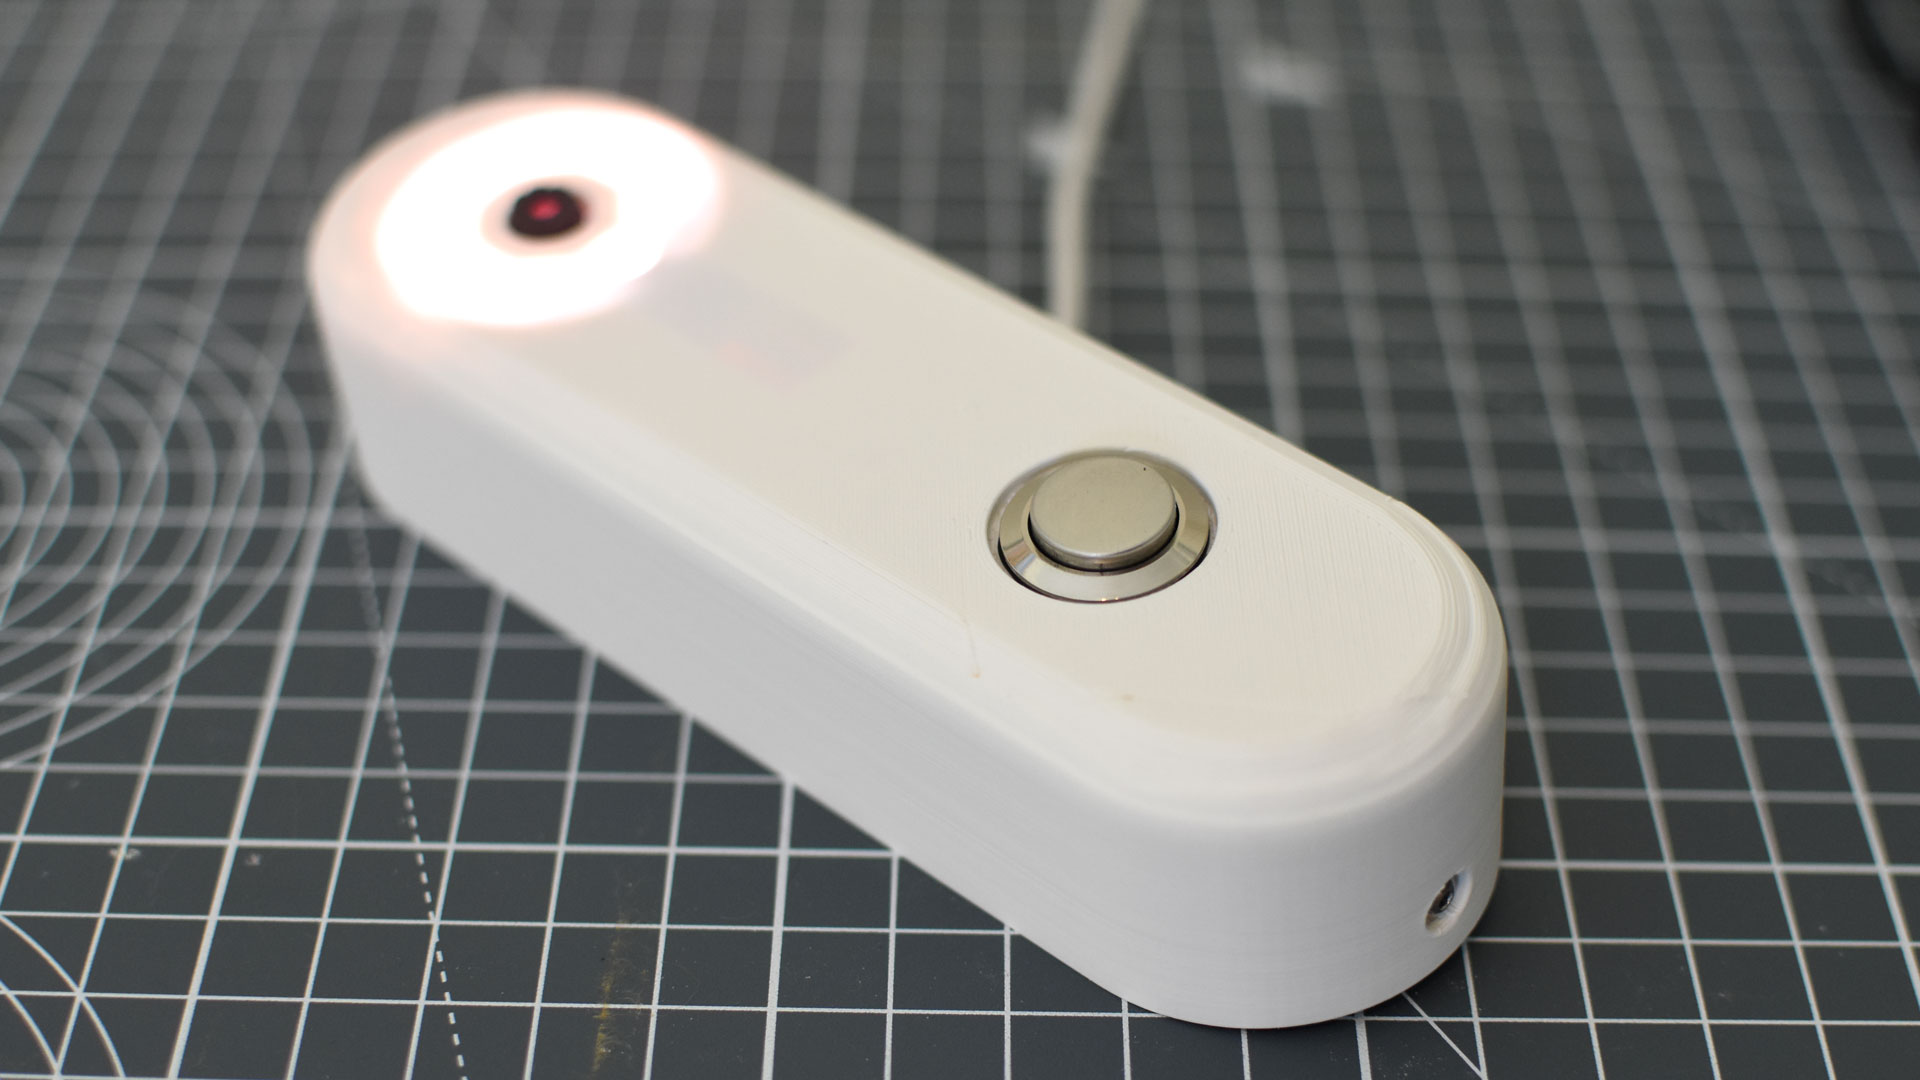
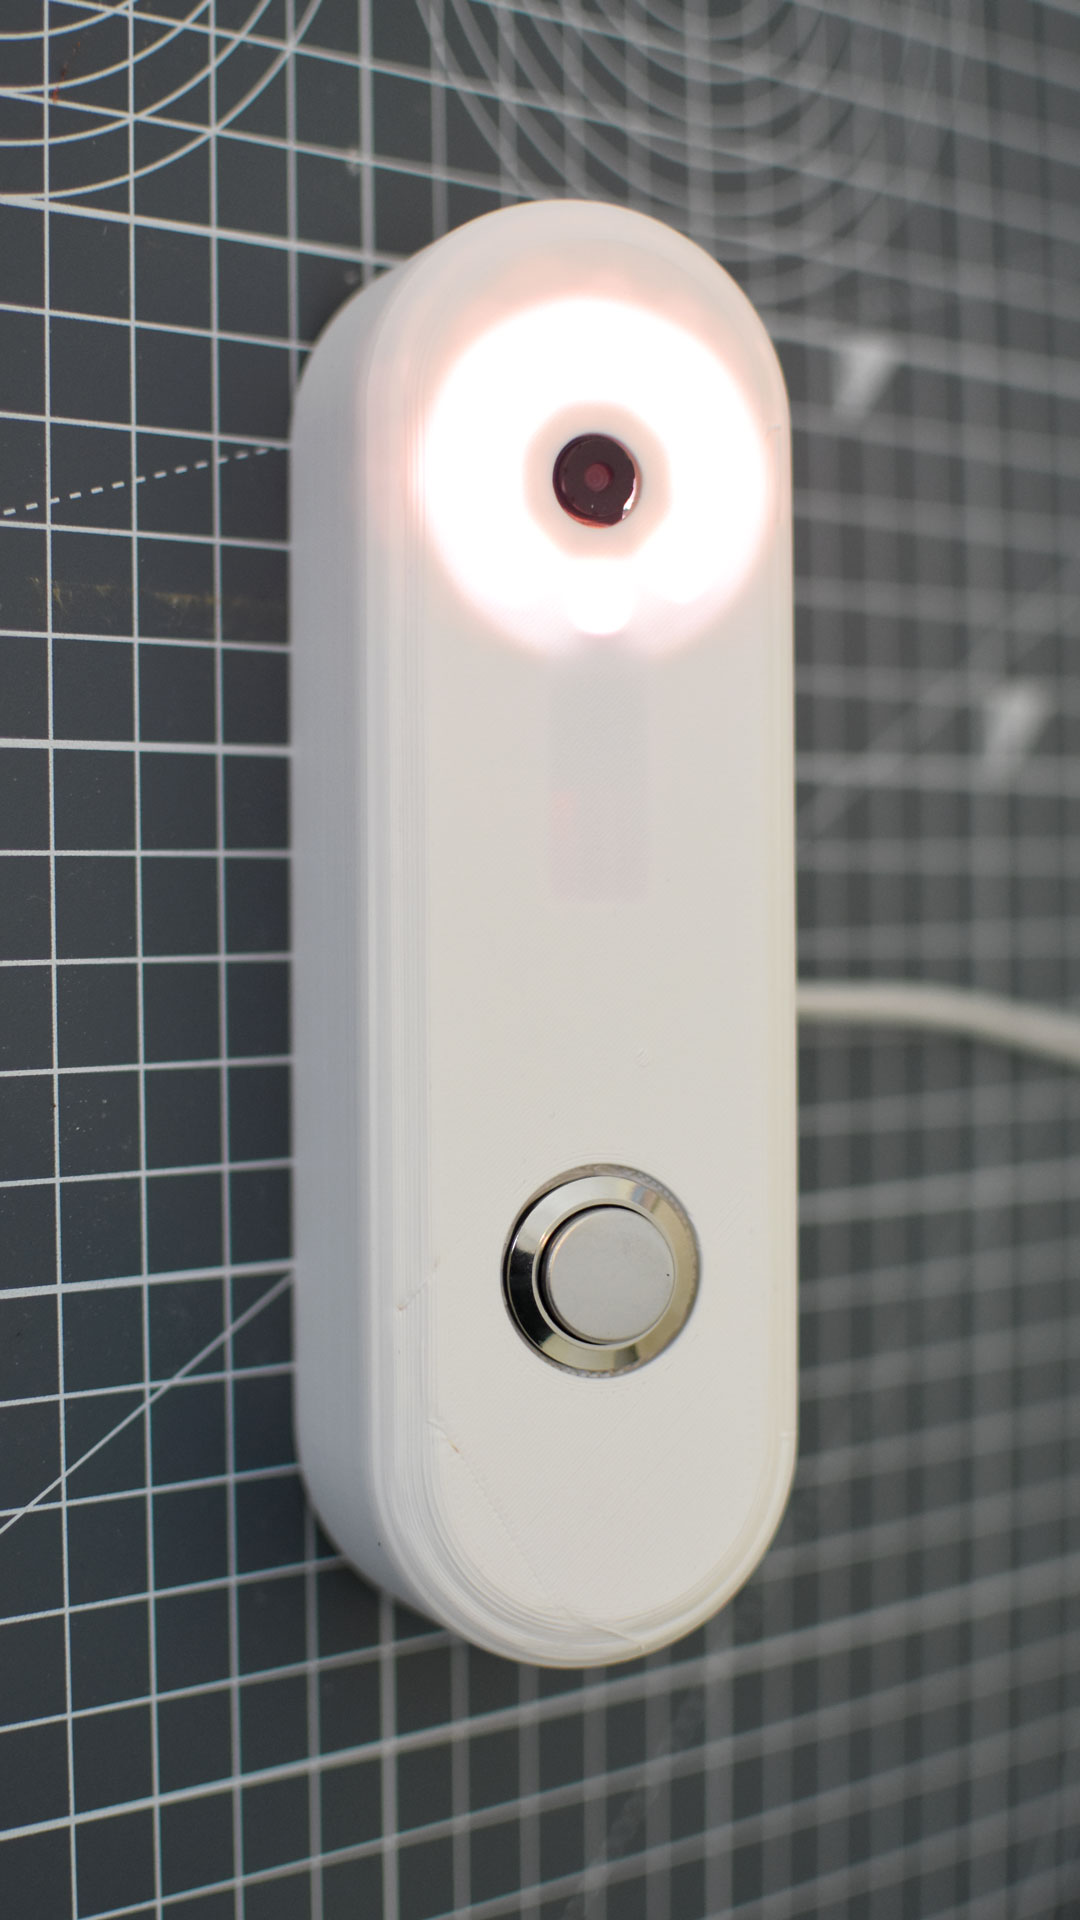
Here are some pics of mine before it goes up next to the front door!
*The product links in this post may contain affiliate links. Any commission earned is used to keep the servers running and the gin cool.
Thanks for making it to the end of the post! Did this article help you or do you like my work?
☕Buy Me a Coffee☕
Note: This article have been indexed to our site. We do not claim legitimacy, ownership or copyright of any of the content above. To see the article at original source Click Here

Survivor: The Tribe Has Spoken by Exploding Kittens - The only Official Card Game for Survivor Fans - Family Party Game for…
$19.82 (as of March 11, 2025 19:45 GMT +00:00 - More infoProduct prices and availability are accurate as of the date/time indicated and are subject to change. Any price and availability information displayed on [relevant Amazon Site(s), as applicable] at the time of purchase will apply to the purchase of this product.)
Organic Tallow Sunscreen SPF30 - Non-Toxic Natural Mineral Sunscreen for all Skin Types - Chemical Free…
$24.99 (as of March 11, 2025 19:45 GMT +00:00 - More infoProduct prices and availability are accurate as of the date/time indicated and are subject to change. Any price and availability information displayed on [relevant Amazon Site(s), as applicable] at the time of purchase will apply to the purchase of this product.)
desin Car Windshield Cleaning Tool, Windshield Cleaner with 5 Washable and Reusable Microfiber Pads and…
$9.99 (as of March 11, 2025 19:45 GMT +00:00 - More infoProduct prices and availability are accurate as of the date/time indicated and are subject to change. Any price and availability information displayed on [relevant Amazon Site(s), as applicable] at the time of purchase will apply to the purchase of this product.)
Elixir Strings, Acoustic Guitar Strings, 80/20 Bronze with NANOWEB Coating, Longest-Lasting Bright and Focused Tone with Comfortable Feel, 6 String Set, Light 12-53
$16.99 (as of March 11, 2025 20:21 GMT +00:00 - More infoProduct prices and availability are accurate as of the date/time indicated and are subject to change. Any price and availability information displayed on [relevant Amazon Site(s), as applicable] at the time of purchase will apply to the purchase of this product.)